You're staring at a digital canvas, but instead of pristine pixels, a sudden shudder of broken data makes your heart skip a beat. Jagged lines, frantic flickering, and unsettling distortion—these aren't always errors to fix, but often, the deliberate brushstrokes of a new kind of artist. Welcome to the captivating world of specific glitch patterns, where the digital realm's imperfections become its most potent form of expression.
We’re not talking about a frustrating system error that leaves you wondering how to fix a glitching Chromebook screen. Instead, we're diving into the aesthetic of digital decay, understanding how these iconic visual anomalies emerge and, crucially, how you can harness them to infuse your own creations with an edgy, mysterious, and unforgettable vibe.
At a Glance: Decoding Glitch Patterns
- Glitch effects are purposeful digital disruptions that introduce distorted, fragmented visuals.
- They add an edgy, mysterious, and futuristic aesthetic to digital art, videos, and photography.
- Common patterns include horizontal/vertical lines, rapid flickering, and complex distortion (warping, pixelation, color shifts).
- You can create these effects using various software, from Adobe Photoshop and After Effects to specialized glitch tools.
- Key techniques involve channel manipulation, displacement maps, wave filters, blending modes, and adding noise.
- Preparation is crucial: always work with high-quality source material and duplicate your files.
- The goal is to balance visual impact with legibility, ensuring your artistic message shines through the digital chaos.
The Allure of Digital Malfunction: What Are Glitch Effects?
Think back to the fuzzy reception of old CRT TVs, the skipping CD player, or a corrupted video file on a struggling hard drive. These weren't desirable outcomes, but over time, they etched themselves into our collective digital consciousness. Glitch effects are, at their core, a deliberate mimicry of these digital disruptions. They are visual and auditory anomalies, characterized by distorted, fragmented, and corrupted elements, creating a sense of controlled digital chaos.
Beyond mere nostalgia, this aesthetic offers a unique and futuristic twist to digital creations. It injects an edgy, mysterious atmosphere, enhancing visual appeal and emotional impact by introducing unpredictability and imperfection. Whether you're aiming for a cyberpunk vibe, a retro-futuristic aesthetic, or simply a striking piece of abstract art, understanding how to apply specific glitch patterns like lines, flickering, and distortion is your ticket in.
Decoding the Digital Chaos: Specific Glitch Patterns
While the term "glitch" can encompass a broad range of digital errors, three specific patterns frequently dominate the artistic landscape: distinct lines, rapid flickering, and broad distortion. Each offers unique visual characteristics and evokes different emotional responses.
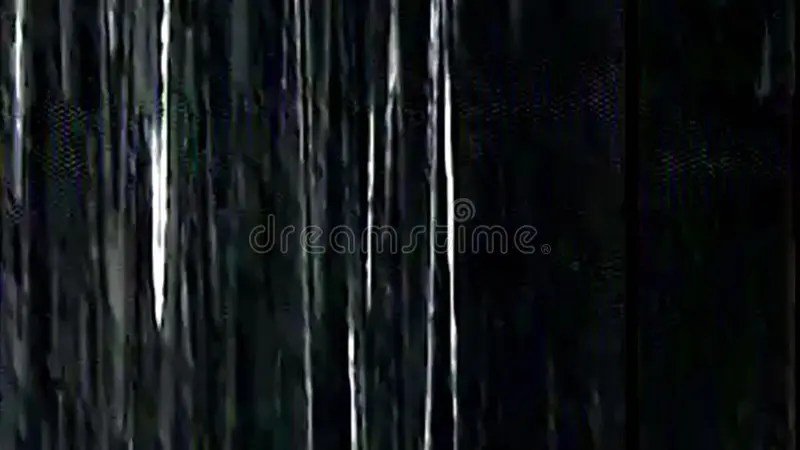
Lines: The Digital Tear
What they look like: These are often straight, sometimes jagged, horizontal or vertical streaks that slice across an image or video. They can appear as single, stark interruptions or as dense arrays, resembling scan lines, data tears, or corrupted signal trails. Sometimes, they might even appear as subtle, repetitive patterns mimicking static or transmission interference.
Why they happen (digitally): In real-world technical glitches, lines often result from issues with data transmission, display refresh rates, or corrupted pixel information. Imagine a video signal briefly cutting out, leaving a trail of the previous frame.
How to create them artistically:
- Custom Patterns: In tools like Photoshop, you can load or create custom patterns made of thin horizontal or vertical lines. Filling a new layer with one of these patterns and then playing with its blending mode (like
Overlay) and opacity allows you to subtly or overtly introduce these structures. - Displacement & Waves: Applying a
Wavefilter with specific settings (e.g., a square wave type, high wavelength) can effectively pull and push pixels into linear arrangements, creating the appearance of data tearing. - Pixel Sorting (Advanced): This technique involves sorting pixels based on certain criteria (e.g., color, brightness) within defined horizontal or vertical boundaries, resulting in striking linear disruptions.
- Noise Overlays: A subtle overlay of horizontal line patterns, perhaps with a low opacity and a
ScreenorOverlayblending mode, can instantly create a flicker-like effect or simulate the appearance of an aged display.
Flickering: The Ephemeral Shutter
What it looks like: Flickering refers to rapid, intermittent visual changes. This can manifest as sudden shifts in color, brightness, or even the brief appearance and disappearance of entire sections of an image. It creates a sense of instability, urgency, or an unstable signal trying to re-establish itself.
Why it happens (digitally): Real-world flickering often stems from issues with refresh rates, inconsistent power supply, or rapid, intermittent data stream interruptions. Think of a light bulb about to die or a loose cable connection.
How to create it artistically:
- Layer Opacity & Blending: The simplest way to create flickering in an image is to duplicate layers, apply different effects or color shifts, and then animate their opacity or visibility over a short duration. Rapidly switching between two or three slight variations of a layer can give an instant flicker effect.
- Animated Effects: In video editing software like After Effects, you can use keyframes to quickly adjust exposure, color balance, or the position of a glitch layer. Short, sharp bursts of adjustment followed by resets will produce a convincing flicker.
- Pattern Overlays (Animated): Similar to lines, animating the opacity or position of a granular noise or line pattern can introduce a dynamic flicker, especially when combined with a low opacity and a strong blending mode. The Photoshop tutorial's "Horizontal Lines" step, filled with a glitch pattern and set to
overlayat50% opacity, is a perfect example of creating this visual noise.
Distortion: The Warped Reality
What it looks like: Distortion is the broadest category, encompassing a wide array of visual anomalies where the image itself appears warped, stretched, broken, or re-arranged. This can range from subtle pixel shifts to dramatic, unrecognizable fragmentation, color channel separation, or geometric contortions.
Why it happens (digitally): Distortion often occurs when data is misinterpreted, compressed incorrectly, or subjected to extreme processing. Think of a severely corrupted image file where blocks of pixels are misplaced or colors are wildly shifted.
How to create it artistically:
- Wave Filters: This is a cornerstone for creating organic, wave-like distortions. As seen in the Photoshop guide, applying the
Filter > Distort > Wavefilter with varyingsquarewave types,generations,wavelength, andamplitudecan dramatically twist and stretch your image. Experimenting with horizontal and vertical scales allows you to control the direction and intensity of the warp. - Displacement Maps: These are grayscale images used to "displace" pixels of another image, pushing them around based on the map's light and dark areas. A custom glitch pattern can be used as a displacement map to create unpredictable, fragmented distortions.
- RGB Channel Manipulation: One of the most striking distortion techniques involves isolating and shifting individual Red, Green, and Blue color channels. By unchecking specific channels in a layer's blending options and then applying distortion (like another
Wavefilter) or slight movements to that channel, you create vibrant chromatic aberrations and offset ghosting effects. This is exactly what theGLITCH 2(red tone) andGLITCH 3(blue tone) layers in the Photoshop guide demonstrate. - Motion Blur: While traditionally used to simulate movement, applying a
Motion Blurfilter at specific angles and distances (e.g.,0angle and93 pixelsdistance as in theGLITCH 3layer) can extend pixels into streaky distortions, particularly effective when combined with color shifts. - Liquify Tools: In applications like Photoshop, the
Liquifyfilter offers a more manual, fluid way to push, pull, and warp sections of an image, mimicking the appearance of corrupted data flow.
Your Glitch Lab: Essential Tools and Preparation
Before you dive headfirst into distorting pixels, having the right tools and a smart approach is key to achieving compelling results without losing your original work.
Software and Tools for Glitch Art
The digital art landscape offers a wealth of options for crafting glitch effects, catering to various skill levels and project requirements:
- Adobe Photoshop: Excellent for static image manipulation. Its layers, blending modes, filters (like Wave), and adjustment layers make it incredibly versatile for creating complex, multi-layered glitch patterns.
- Adobe After Effects: The go-to for animated glitch effects. Its extensive toolset, keyframing capabilities, and vast plugin ecosystem allow for dynamic, time-based distortions, flickering, and transitions.
- Max/MSP: A visual programming language that's perfect for those who want to deep-dive into custom coding and generative glitch art. It offers unparalleled control over real-time audio and visual processing.
- Glitchmachines’ Fracture XT: A specialized standalone tool designed specifically for intricate glitch patterns and sound design, ideal for detailed audio-visual corruption.
- Datamosh plugins: These unique tools are designed to deliberately corrupt video files by manipulating their compression data, leading to stunning, fluid-like pixel shifts and blocky distortions that are difficult to achieve otherwise.
Preparing Your Canvas for Creative Corruption
The secret to great glitch art often lies in the quality of your initial setup. Think of it as controlled chaos – you need a solid foundation before you introduce the "chaos."
- High-Quality Source Material: Start with images or videos that are high resolution, sharp, and have good contrast. Diverse colors and interesting compositions (especially those with repetitive patterns or high-frequency details) tend to yield more visually engaging glitches. A poor-quality original will only produce a poor-quality glitch.
- Duplicate Your Files: This is non-negotiable! Always create a backup of your original file. This allows for non-destructive experimentation, ensuring you can always revert to your pristine source if needed. Many advanced glitch techniques are destructive, so this step saves you heartache.
- Alter Color Space or Adjust Basic Properties: Sometimes, a simple pre-glitch step can make a huge difference. Experiment with converting your image to grayscale, isolating different color channels, or adjusting brightness and contrast. These changes can react uniquely with glitch filters, unlocking unexpected effects.
- Consider the Composition: Before you apply any effects, think about where you want the glitch to occur. Do you want it to affect the entire image, or just a specific focal point? High-frequency details (like intricate textures or patterns) and strong edges often provide the most interesting glitch interactions.
Crafting the Glitch: A Step-by-Step Artistic Approach
Now, let's get practical. Drawing from the techniques used in professional glitch art, here’s a generalized process for introducing those captivating lines, flickering, and distortions. Remember, the best glitch art comes from experimentation, so use these steps as a launchpad, not a rigid rulebook.
1. Setting the Stage with Controlled Disruption
Your first step is often to establish a foundational layer of chaos that will interact with your subject.
- Initial Glitch Pattern Layer: Create a new blank layer and fill it with a custom glitch pattern (often a dense array of small lines, squares, or static). This "glitch distort" layer, as seen in the Photoshop guide, acts as a displacement map or a texture for subsequent effects. You might set its blending mode to
NormalorOverlayand adjust its opacity to control its influence. - Duplicate and Isolate: Always start by duplicating your background layer. This ensures your work is non-destructive. If you're only glitching a specific part of your image, isolate that area into its own layer or Smart Object.
2. Warping Reality with Wave Filters
This is where the magic of distortion truly begins, creating the iconic stretched and warped effects.
- Base Distortion Layer (e.g., GLITCH 1): Take a duplicated layer, convert it to a Smart Object, and then apply
Filter > Distort > Wave. This filter is incredibly versatile. Experiment with: - Type:
Squareoften gives the most "glitchy" blocky or linear distortions. - Generators: More generators create more waves.
- Wavelength & Amplitude: These control the size and intensity of the waves. Small wavelengths with high amplitude create tighter, more chaotic distortions.
- Scale (Horizontal/Vertical): Use this to stretch or squash the effect.
- Undefined Areas:
Repeat Edge Pixelsis generally a safe bet to avoid blank spaces. - Introduce Randomness: Beyond the Wave filter, consider techniques like datamoshing (for video) or pixel sorting (for images). These methods introduce algorithmic randomness, creating unique and often unpredictable visual outcomes that are hard to replicate manually.
3. Color Channels Gone Rogue: The Chromatic Shift
One of the hallmarks of striking digital distortion is the separation and shifting of color channels. This creates a vibrant, almost holographic effect.
- Isolate and Shift Colors (e.g., GLITCH 2 & GLITCH 3): Duplicate your original layer twice. For each new layer:
- Convert to a Smart Object.
- Open
Layer Blending Style Options. Here, you can uncheck theRed,Green, orBluechannels. For example, unchecking Green and Blue will leave you with only the Red channel visible on that layer. - Apply a distinct
Filter > Distort > Wave(or a similar distortion filter) to each color-isolated layer. The Photoshop guide uses different wave settings for the red-tonedGLITCH 2and blue-tonedGLITCH 3layers. - Slightly move these color-shifted layers using the Move tool, or apply a gentle motion blur, to offset them from the main image, creating chromatic aberration.
4. Blurring the Boundaries: Adding Movement and Softness
Sometimes, glitches aren't sharp and angular; they can also be smeared or dragged, implying motion or data corruption during transit.
- Adding Motion Blur: On one of your glitched layers (often a color-shifted one, like
GLITCH 3), applyFilter > Blur > Motion Blur. An angle of0and a significant distance (e.g.,93 pixels) will create a horizontal streaking effect, enhancing the sense of digital data being dragged or corrupted. - Layering and Blending: Enhance the effect by duplicating your glitched layers and experimenting with different blending modes (
Overlay,Screen,Multiply,Difference,Exclusionare great for glitch art) and opacities. This allows you to combine various glitch types and color shifts into a cohesive, complex aesthetic.
5. Introducing Visual Noise: The Horizontal Lines & Flicker
To truly sell the "corrupted signal" look, you need that gritty texture.
- Horizontal Lines Layer: Add another new blank layer. Fill it with a second custom glitch pattern, often one specifically designed to look like dense horizontal lines or television static. Set its blending mode to
Overlayand lower itsOpacity(e.g., to50%) to create a subtle flicker or signal interference effect. This helps to unify the other distortions. - Noise Filters: Apply a noise filter (like
Add Noisein Photoshop) to a new layer and blend it in, or overlay a noise texture, to simulate analog signal imperfections and add grit.
Elevating Your Glitch Art: Advanced Techniques and Enhancements
Once you have your core glitch patterns established, you can refine and enhance them to truly make them pop. These steps move beyond the basic application of effects and delve into stylistic choices that can define your glitch aesthetic.
Adding Depth with Lighting and Toning
Even in digital chaos, strategic lighting and color can dramatically alter the mood.
- Center Lighting (Vignette): A radial gradient fill can draw the eye and add depth. Add a
Gradient Filladjustment layer, choosing ablack to transparentpreset. Change the color stops to adark greyon one side andwhiteon the other. Set the style toRadial, checkReverse, and position it to create a subtle central light source, almost as if the glitch is emanating from a core. Adjust the blending mode toOverlayand reposition as needed. - Color Toning (Mood Setting): A
Color Lookupadjustment layer is a powerful tool for instantly shifting the mood. Presets like "horror blue look" can immediately give your glitch a cold, unsettling, or futuristic feel. - Desaturation for Intense Horror: For a more stark and unsettling effect, you can desaturate your main glitch layers (
GLITCH 1,GLITCH 2,GLITCH 3from our example). Add aHue/Saturationadjustment layer and clip it to your glitch layers, setting the saturation to-100. This creates a monochromatic, almost post-apocalyptic feel.
Further Distortion and VHS-like Filters
Don't be afraid to double down on the chaos or lean into retro charm.
- More Distortion: Don't limit yourself to just one type of distortion. Combine displacement maps with liquify tools, or blend multiple distorted layers with different blending modes for increasingly complex and unsettling effects.
- VHS-like Filters: To evoke a sense of aged, degraded media, apply color grading techniques. Adjust color balance, saturation, and contrast to mimic the faded, slightly green-shifted tones of old VHS tapes. Adding subtle chromatic aberration, scan lines, and light compression artifacts can complete the illusion.
It's important to remember that these artistic techniques are about creating the look of a glitch. If you're actually dealing with a frustrating technical issue, like a persistent flicker on your Chromebook screen, the solutions will be entirely different – focusing on hardware checks, driver updates, or system diagnostics rather than creative filters.
Common Glitch Misconceptions & Troubleshooting Artistic Efforts
Even for experienced digital artists, understanding and implementing glitch effects can present a few hurdles. Let's clarify some common misunderstandings and offer tips for when your glitch isn't quite glitching as intended.
"It's Just Random Noise, Anyone Can Do It."
While some glitch techniques involve randomness, effective glitch art is far from haphazard. It requires a keen eye for composition, an understanding of how different effects interact, and a deliberate aesthetic choice. The goal isn't just to make things messy, but to create meaningful visual disruption that enhances, rather than detracts from, your message. It's the difference between accidentally breaking something and thoughtfully deconstructing it.
"You Need Expensive, Specialized Software."
While professional tools like After Effects offer incredible power, you don't always need them. Even basic photo editors can achieve simple glitch effects through clever use of existing filters, copy-pasting, and layer manipulation. Many free or open-source tools also exist, capable of sophisticated pixel sorting and data bending. The choice of software primarily depends on your skill level and the complexity of your desired output.
"It Will Destroy My Original File."
This is why "duplicate your file" is the cardinal rule! When done correctly, modern glitch art is non-destructive. Using Smart Objects, adjustment layers, and duplicated layers ensures that your original image or video remains untouched, allowing you to iterate, refine, or revert at any point.
Troubleshooting Your Artistic Glitch
- "My glitch is too subtle, it's barely noticeable."
- Increase Amplitude/Generations: If using Wave filters, push the amplitude and generations higher.
- Stronger Blending Modes: Experiment with
Difference,Exclusion, orLinear Dodgefor more aggressive interactions. - More Layers: Duplicate your glitch layers and apply slight variations, then blend them.
- Saturate: Boost the saturation of your color-shifted glitch layers.
- "My glitch is too overwhelming, I can't see the original image."
- Lower Opacity: Reduce the opacity of your glitch layers.
- Weaker Blending Modes: Try
Soft Light,Overlay, orScreenfor lighter effects. - Masking: Use layer masks to reveal the original image in key areas, allowing the glitch to frame or highlight your subject rather than obscure it entirely.
- Less is More: Sometimes, a single well-placed glitch effect is more impactful than many layered ones.
- "It doesn't look like a real glitch."
- Reference Real Glitches: Study examples of actual data corruption, VHS tracking errors, or signal interference. What are the common patterns? How do colors shift?
- Combine Patterns: Real glitches rarely present as just one type of anomaly. Combine lines, flickering, and distortions for a more authentic, chaotic feel.
- Add Noise/Grain: Textural noise helps simulate analog signal imperfections.
Refining Your Glitch Creation: Review and Export
Bringing your glitch masterpiece to life involves more than just applying filters; it’s about thoughtful review and proper delivery.
1. Review and Adjust: The Artist's Eye
Once you've layered your lines, flickering, and distortions, take a step back.
- Holistic View: Does the glitch enhance your image's narrative or aesthetic, or does it merely distract?
- Balance: Is there a good balance between the glitched elements and the underlying content? Can the viewer still understand the main subject or message?
- Distortion Levels: Are the distortions too subtle or too aggressive? Tweak opacities, filter settings, and blending modes until the visual impact is just right.
- Color Harmony: Even with chaotic color shifts, consider if the overall color palette works. You might adjust global color toning to unify disparate glitched elements.
2. Optimize for Platforms: Where Will It Live?
Consider where your glitch art will be displayed. This dictates your technical specifications.
- File Size: Heavily glitched images or videos can become large. Be mindful of compression and file format if you're sharing online.
- Resolution: Maintain appropriate resolution for web, print, or screen display. A high-resolution glitch will look much better than a low-res one, even if it's "broken."
- Supported Formats: Different platforms support different file types. Social media platforms might prefer MP4 for videos and JPG/PNG for images. Animated glitches often work well as GIFs for short loops.
3. Export Appropriately: Final Delivery
The final step is to save and share your work in a way that preserves its quality.
- For Images: Export as a high-quality JPEG or PNG. JPEG is great for smaller file sizes, while PNG offers lossless compression and transparency support if needed.
- For Videos: MP4 is a widely compatible and efficient format. Ensure your export settings (bitrate, codec) balance quality and file size.
- For Shorter Loops/Animations: GIFs are excellent for short, looping glitch animations, especially for web display, though they have a limited color palette.
Remember, the objective of glitch art is controlled chaos. Even if your ultimate goal is to create something that looks broken, you want to ensure that it’s your intentional brokenness, perfectly preserved for your audience to appreciate.
Beyond the Glitch: The Enduring Appeal of Digital Imperfection
The world of digital art is constantly evolving, and glitch effects are more than just a passing trend. They represent a powerful artistic tool, offering endless creative possibilities to inject visual interest, evoke emotion, and provide a unique artistic expression in our increasingly digital lives. From the precise cutting of lines to the frenetic energy of flickering and the disorienting beauty of distortion, these patterns allow us to explore the underbelly of technology and find beauty in its imperfections.
So, whether you're a seasoned digital artist or just beginning to experiment, don't shy away from the digital chaos. Embrace the lines, the flicker, and the distortion. Dive in, experiment, and discover how these specific glitch patterns can transform your creations into something truly unforgettable. Your digital canvas awaits its next beautiful breakdown.